Friday, March 5, 2010

Flowers for a Friend


I made more flower cookies for a co-worker yesterday. I meant to start them Wednesday night, but Andrew and I were exhausted, so I didn't start until Thursday morning.


She wanted 10 cookies, but let me choose the style and color. I picked blue, light blue, and white flowers.


I had a few extra, so I've been playing with taking pictures of them on different surfaces.


I also made a bunch of letter cookies, too.


I spelled stuff. Like my blog name.


Baking Bagels

I used to be scared of yeast. Not in a run screaming sort of way, more in an I'm-too-scared-to-use-it-because-I'm-going-to-kill-the-little-yeasty-beasties-and-ruin-my-bread way. It seemed so difficult to get the liquid to the right temperature, warm enough to make it bubble but not hot enough to kill the yeast. Then I found recipes that called for instant yeast, and they seemed way less complicated.

With instant yeast, you just add it straight to the flour. I love it - one less bowl to wash and no sitting on the edge of my seat waiting to see if the yeast and liquid mixture bubbles. You can find instant yeast in some grocery stores, but if yours doesn't sell it, you can always order it online (KingArthurFlour.com sells it).*

These bagels are so easy to make, they always turn out great, and they don't take long at all (at least they don't take long when compared to other bread recipes). I got the recipe from KingArthurFlour.com
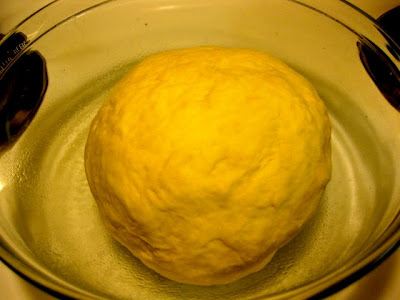

To make them, you combine 4 cups bread flour, 1 tbsp instant yeast, 2 tsp salt, 1 tbsp brown sugar (or non-diastatic malt powder - but I don't know what that is or where to find it in the store, so I use brown sugar), and 1 1/2 cups luke warm water.

Knead the mixture by hand or with a mixer until it's smooth. If you have a stand mixer and a dough hook, just throw everything in the bowl of the mixer, turn in on low, and just let it mix for about 10 minutes.

To knead by hand, first stir ingredients together, then turn out onto a clean surface. Fold dough into thirds, turn 90 degrees and fold into thirds again. Continue about 10 - 15 minutes, or until the dough is smooth. The bread flour keeps it from being as sticky as white sandwich bread, so it's not too messy and doesn't coat your hands, but it does require more effort to knead.

Place the dough in a lightly greased bowl, cover with a clean towel, and let it sit and rise for 1 to 1 1/2 hours.


Separate the dough into 8 sections and form into balls. Cover those and let them sit for about 30 minutes.

While the dough is resting, preheat the oven to 425 degrees and prepare a cookie sheet by covering it with parchment paper or lightly greasing it.

Then, prepare the water bath. Combine 2 quarts of water, 2 tbsp brown sugar, and 1 tbsp granulated sugar in a wide diameter pan. I use a high sided wok. Bring it to a boil.


Poke a hole in each piece of dough with your fingers and gently stretch out the dough. I use the handle of a wooden spoon to transfer the bagels to the water bath.


Boil the bagels for 2 minutes on one side and 1 minute on the other side. Then transfer to the cookie sheet. Put the prettiest side facing up if you care about how they look.


Bake for 20-30 minutes at 425 degrees.


We use these for sandwiches, for breakfast smothered with cream cheese, and just as snacks. They don't last very long here.


They take a total of 2- 3 hours to make, and most of that is just waiting for the dough to rise. I love how easy they are to make and how they always turn out right.

*Rapid rise, or bread machine yeast, is easier to find in stores and I've used it in this recipe with no problem, but it can't be substituted for instant yeast in every recipe. Rapid rise yeast works only for recipes that just have one rise; if the recipe has multiple rises, you need instant yeast

Tuesday, March 2, 2010

Bake Sale Cookies

I haven't had a chance to bake recently, so here are some pictures of cookies from the november bake sale.


I looked at a picture of the globe to pipe the world cookies. Each cookie looked great by itself, but their lack of uniformity was extremely obvious when they were all together. Also, my hand was killing me by the time I finished piping the last one!


I packaged each cookie individually and tied a ribbon at the top.


When the flood icing is too thin, it can leak over the outline like the tulip in the middle. I used meringue powder as a "glue" to get the sprinkled to stick to the outline.

I'll have new stuff to post later this week!

Saturday, February 27, 2010

Royal Icing

Royal Icing Tutorial


To get the flat, smooth icing that dries hard enough so you can stack, package, and mail cookies, royal icing is the way to go. To make royal icing, you use powdered sugar plus either meringue powder (they have it in the baking section at craft stores or you can order it online), egg whites and lemon juice (use pasteurized egg whites because they won't be cooked), or corn syrup and milk (not exactly royal icing, but it yields similar results).
I add clear vanilla extract or almond extract as well.


Figuring out the right consistency of the icing is the key to getting smooth, yet easy to control icing. The trick is to run a spoon or knife through the icing and count how long it takes for the surface to smooth out. If it's less than 5 seconds, add more powdered sugar or whip the icing more until it's thicker. If it takes longer than 10 seconds, add water a drop at a time until it's thinner.

For a simple design like the flower, I use only this consistency icing. If the design is more complex, I use a thicker icing to outline the cookie and this thinner icing to fill the inside.


To color the icing, gel past food coloring works best; it won't water down the icing and you only need a tiny bit to dye a lot of icing.


I add the dye with a tooth pick.


Then mix it in gently with a spoon; stirring gently helps pop any bubbles in the icing.


I added just a touch of pink to one bowl, a lot of pink to another bowl plus a touch of purple. I dyed the icing in the tea cup orange and didn't dye the white icing at all.


Set up as many pastry bags as you have colors. I put them in glasses to hold them up while I fill them. You can get pastry bags, couplers, and tips at walmart or the craft store. I mostly use round #2 tips. Couplers allow you to change the tip out without having to get a new bag.


To make the flowers, I first outline the shape of the petal.


Before the outline dries, I begin filling the inside of the petal.


Outline and fill all the petals.


After the petals set for a few minutes, add a white dot for the center.


All the icing will dry flat and smooth. Wait 24 hours before stacking the cookies.

Friday, February 26, 2010

Ethan's Birthday Cookies


I made cookies to send to my brother-in-law for his birthday this year. He's very interested in Russia, so I made the Russian flag in cookie form.


I made cakes with blue stripes and dots because I had extra blue icing after making the flag. I always get worried about making cookies for guys because most of the cookies I usually make are brightly colored and girly or more suited to younger boys (dinosaurs, cars, etc.). Unless the guy is into sports or cars, I have a hard time deciding what to make.


I've been learning, though, that when it comes to food, most men don't really care if it's a pink and girly as long as it tastes good. I do think these cake cookies turned out festive and appropriate for a guy.


I packaged them in individual bags and put them in a box with bubble wrap to mail. Ethan's birthday was last Saturday, but the cookies didn't get mailed until Tuesday... oops...


Ethan got the cookies yesterday, but I forgot to ask him if any of them broke. He didn't mention it, so I'm going to assume they got their in one piece. He did say he liked the Russian flags.

I'm really enjoying making cakes. I can't wait for Andrew's birthday! I already have some ideas.